RTG Bills
How To Import Time From Amicus Attorney V
Part 2
The Organizer Edition of Amicus Attorney V can export time entries to RTG Bills, but it
requires a custom format. Part 1 showed you how to create that
format so that posting entries in Amicus Attorney will produce a properly-formatted file.
The next step is to install RTG Bills Import, a program that reads fees from other programs
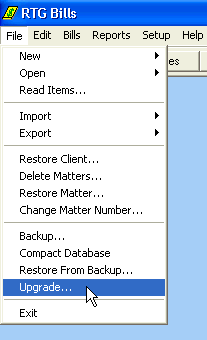
into RTG Bills. Start RTG Bills, choose File > Upgrade, and click Yes to
start RTG Upgrade.
Our goal is to configure RTG Bills Import to read the transactions from Amicus Attorney.
You only have to do this once.
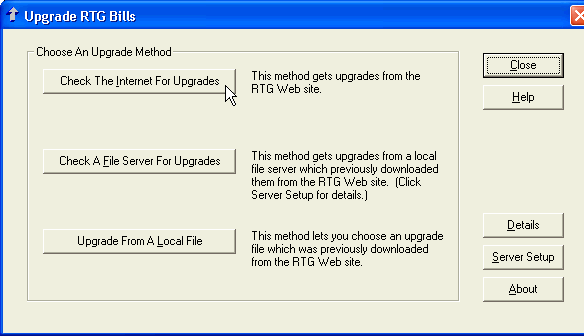
Click Check The Internet For Upgrades. The list of available upgrades will be
read from the RTG Web site.
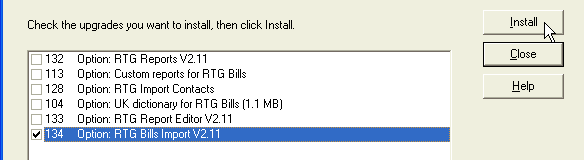
In the list of upgrades, look for RTG Bills Import. Click the box to put a check mark next
to this item. Click Install to download and install RTG Bills Import.
When the installation is complete, you can exit from RTG Upgrade.
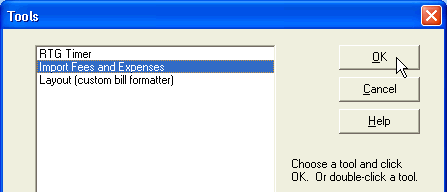
Start RTG Bills and choose File > Tools from the menu. Click on
Import Fees and Expenses in the list of tools, then click OK.
RTG Bills Import will start.
Click the Browse button, to choose a file to import.
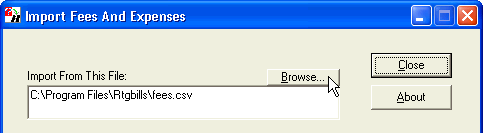
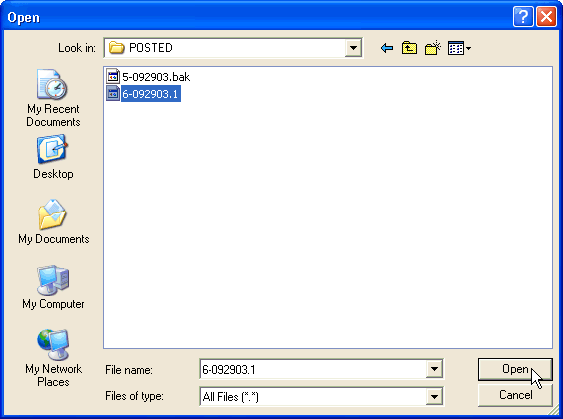
You must locate the file that Amicus Attorney wrote.
In our tests, it was located in the folder C:\Program Files\AMICUS50\POSTED.
The files are identified with a date (e.g., 092903) and possibly other numbers.
If the file extension is .bak, it means that RTG Bills Import has already imported
the file. (RTG Bills Import renames the file so you won't accidentally import the same
transactions twice.)
Click the file you wish to import, then click Open.
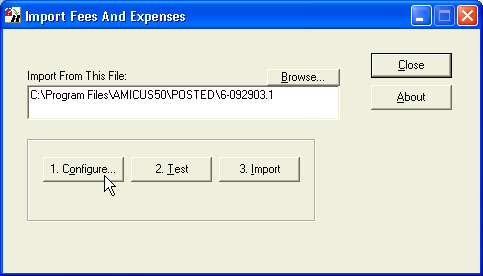
The Import From This File box should show the file you chose.
Click the button labeled 1. Configure.
The choices shown below assume that the Client ID and Matter ID you enter in
Amicus Attorney are the fields known as the client number and case number in
RTG Bills. For example, the RTG Bills matter number 1234-567 consists of a client number 1234
and a case number 567.
One by one, select a field from the left-hand list and click Add > to put
it in the right-hand list. When you are done, the list must look exactly as it appears
in the screen shot below.
In addition, the Field Delimiter must be set to Pipe, not Comma.
The Ignore First Line checkbox must be unchecked.
Whether to check Ignore Rates or not is up to you. If it is checked, RTG Bills will
use the standard rate for the timekeeper (from the appropriate rate table) to set the
hourly rate for each transaction, and the rate assigned by Amicus Attorney is ignored.
If the box is not checked, RTG Bills will
use the rate that was added to the transaction by Amicus Attorney.
Click Save to save the configuration.

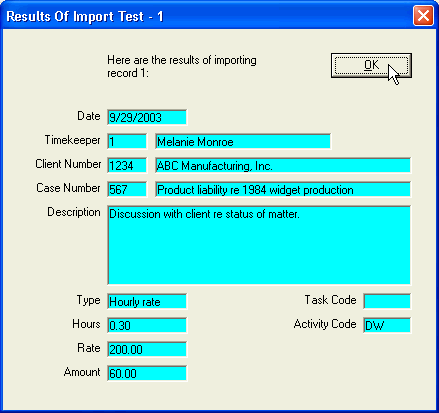
To test that everything is set up properly, click the 2. Test button.
RTG Bills Import will read the time entries from the file you selected.
First you should see a message telling you that no formatting errors were found.
It should also display a record count (how many time entries are in the file created by
Amicus Attorney).
When you click OK, you will see the first time entry.
Click OK. You will see the second time entry (unless there was only one entry).
Click OK.
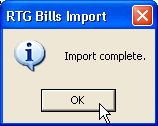
To import the data, click the 3. Import button. Click Yes to proceed
and OK when the import is done.
The data has now been read into the RTG Bills database. The name of the file you imported
has been changed so the extension is now .bak.
Click Browse to import additional files. Once you have chosen another file, simply
click 3. Import to read it.
Click Close to exit from RTG Bills Import. All of your settings are saved
automatically, so you won't need to do any configuration next time.