
Amicus Attorney 7 can "post" time entries by writing a file in a format that RTG Bills can read. You only need to set it up once.
Start Amicus Attorney 7 and choose Go > Office from the menu.
Amicus Attorney 7 can "post" time entries by writing a file in a format that RTG Bills can read. You only need to set it up once.
Start Amicus Attorney 7 and choose Go > Office from the menu.
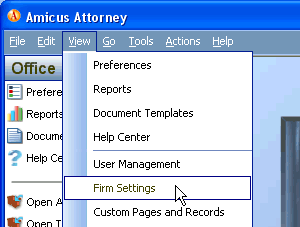
Choose View > Firm Settings from the menu.
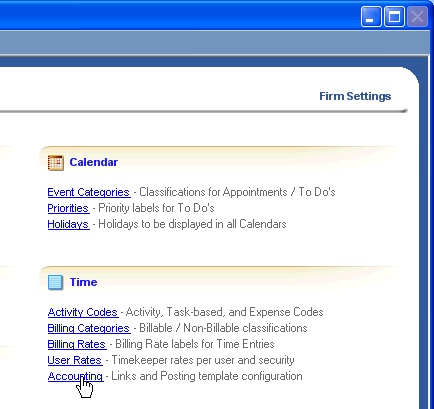
From the Firm Settings page, click on the link that says Accounting.
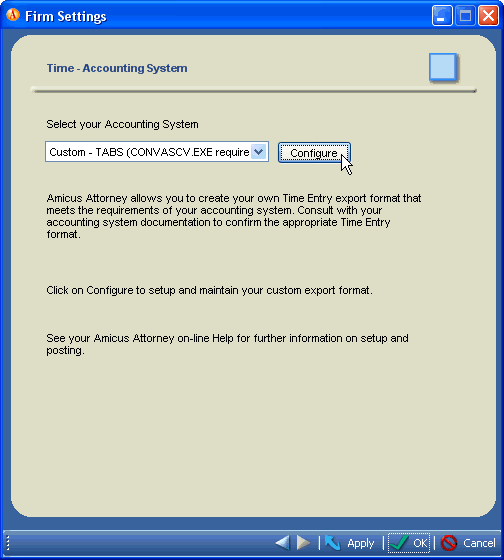
You will now see a window that asks you to Select your Accounting System. From the drop-down list, choose: Custom - TABS (CONVASC.EXE required). Then click the Configure button, which starts the Accounting Profile Wizard.
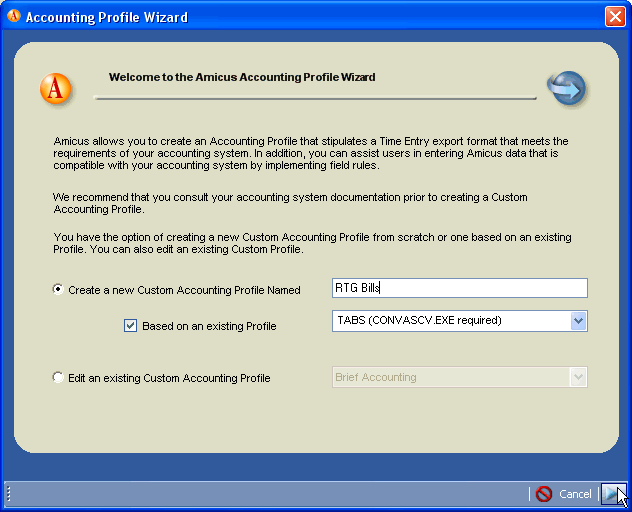
This is the first window of the Accounting Profile Wizard.
Select the option, Create a new Custom Accounting Profile Named and, in the box, type in RTG Bills.
Check the box that says, Based on an existing Profile, and choose, from the drop-down list, TABS (CONVASCV.EXE required).
When everything is set properly, click the Next button, which is the button in the lower-right corner of the window.
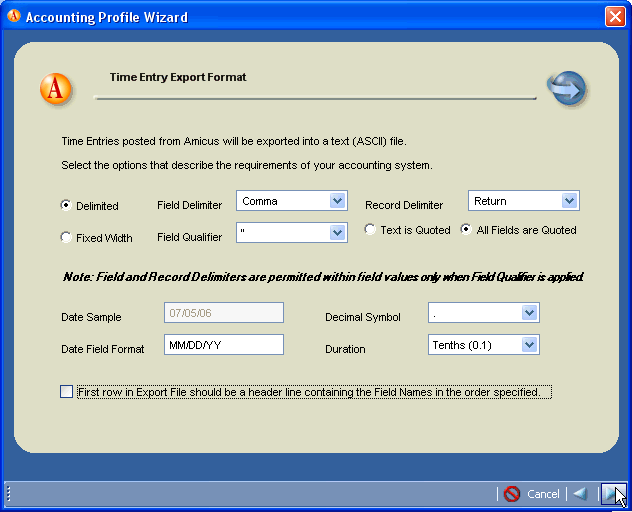
This is the Time Entry Export Format window of the Accounting Profile Wizard.
Make sure all of the settings on your screen match our example. The only one you should need to change is the checkbox, First row in Export File . . ., which should not be checked. Click the checkbox to remove the check mark.
Click the Next button.
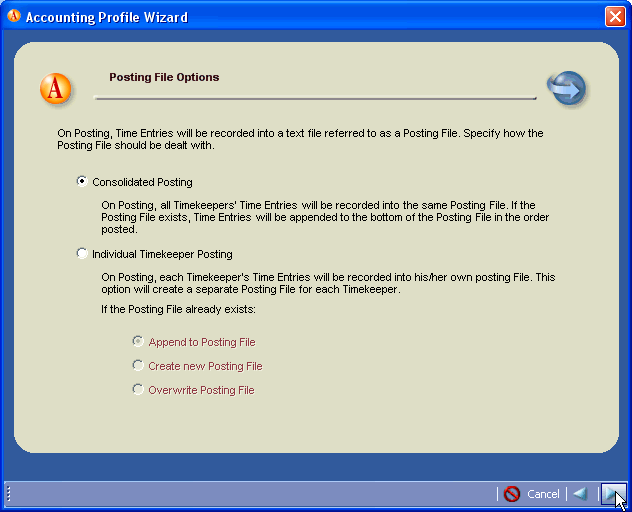
This is the Posting File Options window of the Accounting Profile Wizard.
Choose Consolidated Posting and click the Next button.
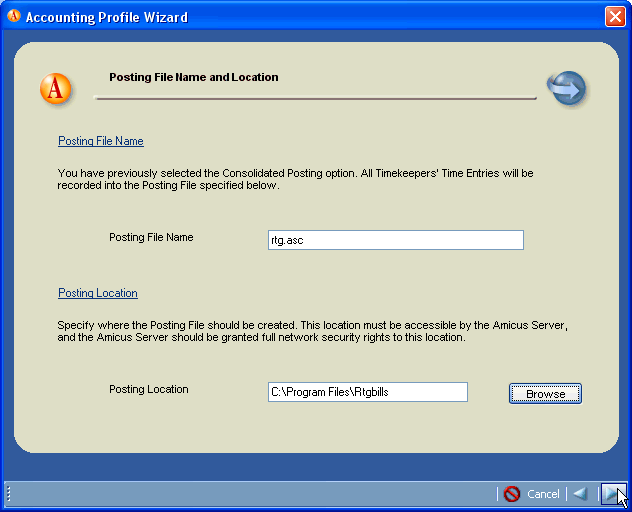
This is the Posting File Name and Location window of the Accounting Profile Wizard. In the Posting File Name box, enter rtg.asc.
In the Posting Location box, enter the location where RTG Bills is installed. If you don't know where RTG Bills is installed, follow these instructions: Where is RTG Bills installed?
Click the Next button.
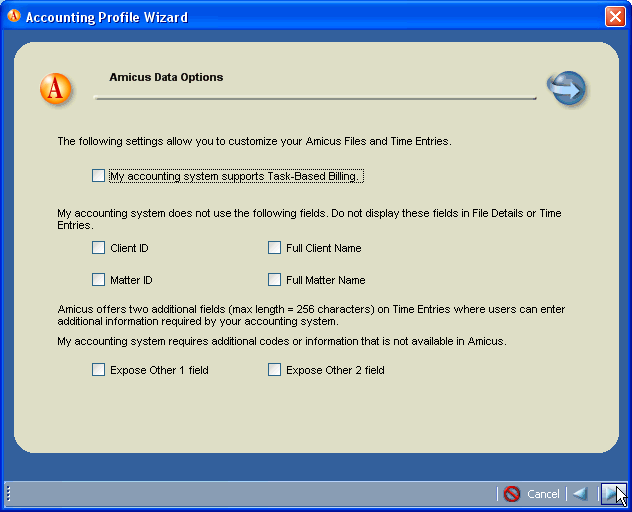
This is the Amicus Data Options window of the Accounting Profile Wizard. None of the checkboxes should be checked.
Click the Next button.
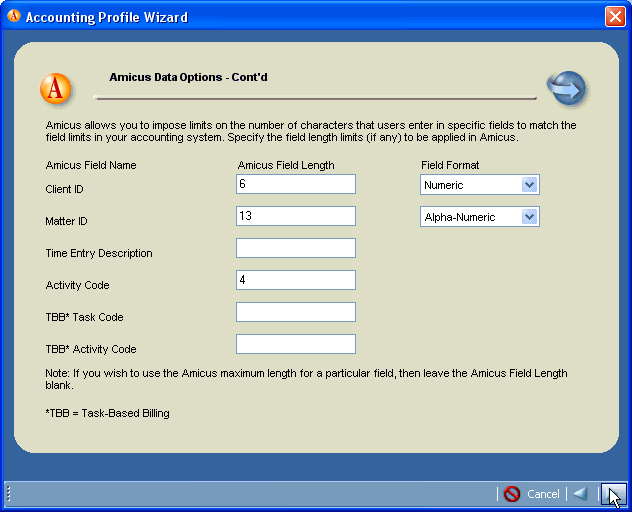
This is the Amicus Data Options - Cont'd window of the Accounting Profile Wizard. Some changes are needed here.
For the Client ID field (the first line), change the Amicus Field Length to 6 and change the Field Format to Numeric. This is the RTG Bills client number, which is always a number of 1 to 6 digits.
For the Matter ID field (the second line), change the Amicus Field Length to 13 and leave the Field Format as Alpha-Numeric. This is the RTG Bills matter number, which has the form 123-45, where 123 is the client number and 45 is the case number.
For the Time Entry Description field (the third line), remove the number in the Amicus Field Length box. Leave it blank.
For the Activity Code field (the fourth line), change the Amicus Field Length to 4. The RTG Bills activity codes are always 2, 3, or 4 characters.
Leave the other two fields blank. We are assuming that you do not need to enter task codes, which are generally required only for electronic billing.
Click the Next button.
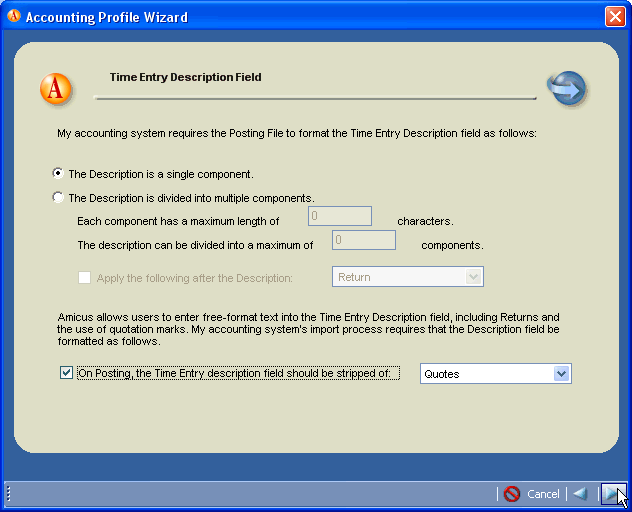
This is the Time Entry Description Field window of the Accounting Profile Wizard. Verify that The Description is a single component is selected.
Check the box that says, On Posting, the Time Entry description field should be stripped of: and change the drop-down listbox to say Quotes.
Click the Next button.
This is the Timekeeper Mapping window of the Accounting Profile Wizard.
For each timekeeper, enter the RTG Bills timekeeper number in the Accounting ID column. It is important to get the numbers right, because only the timekeeper number is sent from Amicus Attorney to RTG Bills.
You can get the timekeeper numbers from the Timekeeper List in RTG Bills.
Click the Next button.

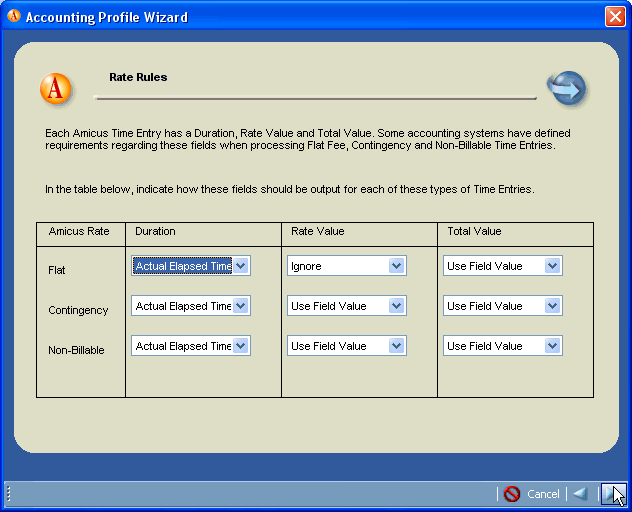
This is the Rate Rules window of the Accounting Profile Wizard. No changes are required here.
Click the Next button.
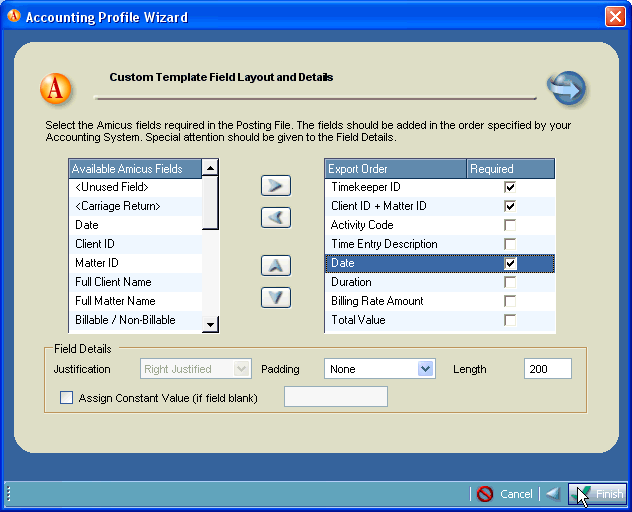
This is the Custom Template Field Layout and Details window of the Accounting Profile Wizard. It is the last window of the wizard.
The proper fields, in the proper order, should already be in the list on the right side of the window. Check them against the image below.
The first two items, Timekeeper ID and Client ID + Matter ID, should both have a check in the Required column. The Date may not have a check. If not, check it now. None of the Field Details require changes.
Click the Finish button to leave the wizard.
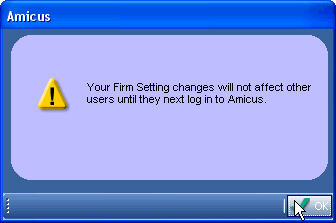
A message appears to tell you that the changes only affect other users when they log in again. Click the OK button.
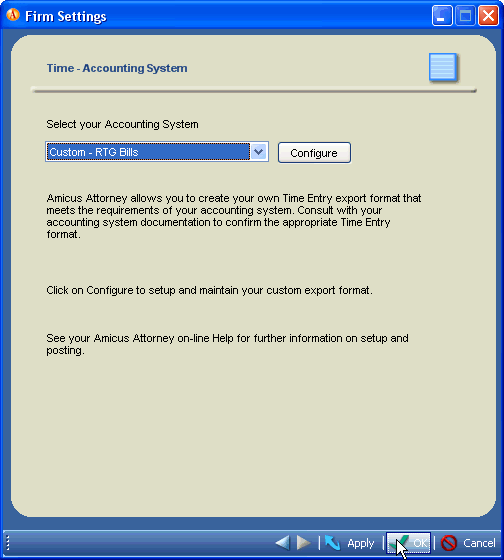
You should see the Firm Settings window on your screen. From the drop-down listbox, choose Custom - RTG Bills. This is the format you just created with the wizard.
Do not click Configure. That just starts the wizard again. Instead, click the OK button at the bottom of the window. This will cause the Firm Settings window to go away.
You should now exit from Amicus Attorney: File > Exit.
Amicus Attorney puts time entries in a file when you click the Post button on the window that displays your unposted time sheets.
The next step is to configure RTG Bills Import so it can read the time entries from
the file created by Amicus Attorney. Click the link to proceed to those instructions:
How To Import Time From Amicus Attorney 7 - Part 2
Copyright © 2006-2013 RTG Data Systems
https://www.rtgsoftware.com